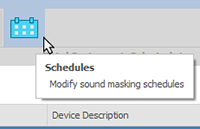
Click the schedules icon to configure soft start schedules, or create sound masking schedules or scheduled message playback.

Soft start allows a designer to set sound masking to 'ramp up' in a space so as to not cause a noticeable, distracting experience when introducing sound masking to an already-occupied space. Start and end dates of the soft start are set according to the preference of the sound masking architect. Soft starts are not required for newly occupied buildings - since occupants would be entering a space with sound masking already in place, no acclimation period would be required. Soft start is set per-zone.
Set the start and end dates along with the desired attenuation level. The attenuation (dB) level of the sound masking may be adjusted as required to optimize the experience for building occupants. If initializing sound-masking in an occupied building, the following settings are recommended to slowly ramp-up the sound masking without disturbing building occupants:
Open Office
Set the attenuation to -5 dB over the course of 2 weeks.
Private Office
Set the attenuation to -3 dB over the course of 1 week.
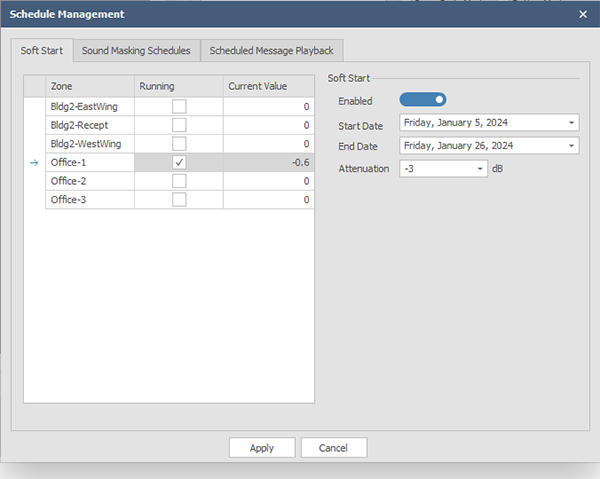
Make appropriate changes and click Apply to send the changes to the system:
Adjustments to the system are made in real time.
Schedules allow sound masking to run at different levels based upon the needs of the organization/building infrastructure. For example, it may not be optimal to have sound masking enabled in a building at night when it is unoccupied except for security personnel. Background music and paging volume levels are not included in, or affected by, sound masking schedules.
Any previously-created schedules will be shown upon clicking the Schedules tab. To create a new schedule, click New. There must be zones not previously assigned to a schedule to be able to create a "New" one.
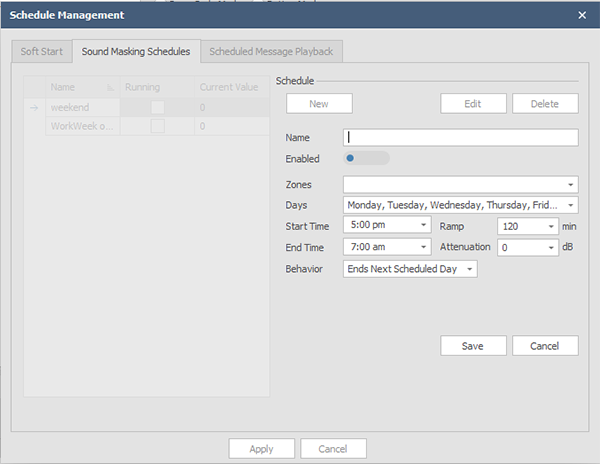
Users may choose all or only certain zones in the selected system. Days, times, and the duration and level of attenuation are all configurable. Setting the behavior is also very important. The choices are "Ends Next Calendar Day" or the "Ends Next Scheduled Day". ex. If an office is only open M-F it wouldn't be necessary to have the schedule running to have sound masking ramping up and down on the weekend, so choose "Next Scheduled Day", and the sound masking will only be at the designated levels on Monday through Friday.
'Enabled' must be toggled on prior to saving to activate the schedule on the system. When the schedule is enabled, there will be a check box in the Running column on the left.
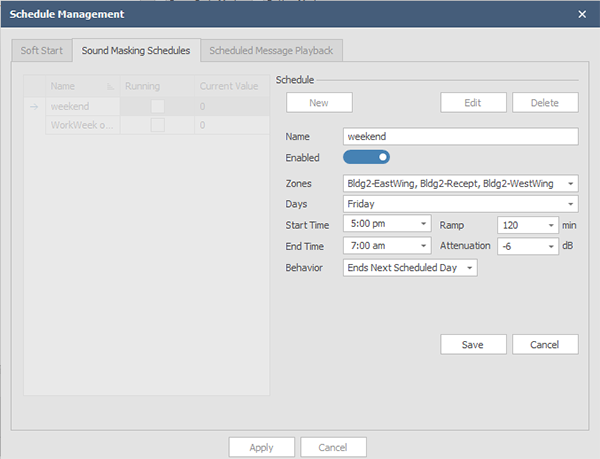
Note: The Start and End times are an engagement point where the attenuation is applied / reduced. Therefore, the following holds true;
Saved schedules will show in the field at left once created. They may be edited/deleted as required. Once the schedules are configured and saved, press the 'Apply' button to send them to the connected system.
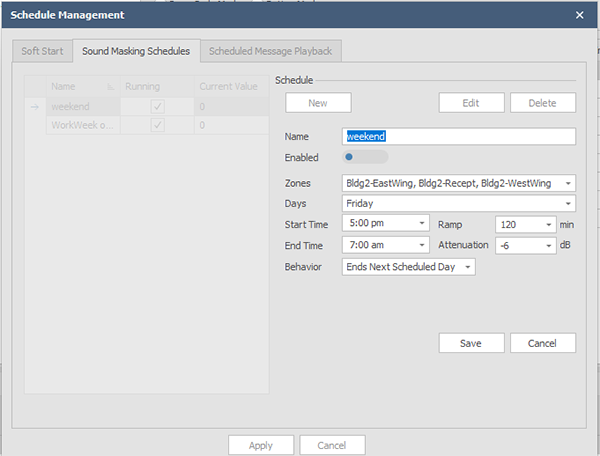
Note: If both Soft Start and Schedules are running, the one applying the most attenuation for a given zone will always take priority.
Prerecorded message announcements may be scheduled in this tab. The recorded message can be added to the system from the Page Codes tab in the Configuration pane. Scheduling a message playback requires that a recorded message/announcement be assigned to and available on one of the 10 slots on the NPX station(s) where it will be played. Typical examples could be a "closing reminder" or "Open for Business" if there are regular days and times that an automated message can be broadcast.
Open the Scheduled Message Playback tab and choose 'New'. Fill in the appropriate fields, choosing the NPX station, a recorded page code assigned to it, start times, days and whether it should repeat. Move the 'Enabled' toggle to the right to enable the schedule item. Then press 'Save'.
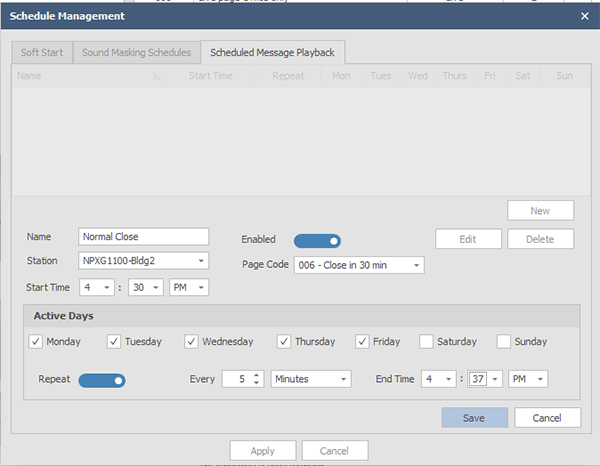
Additional schedules for prerecorded messages may be created for use throughout the system. They can also be edited from this screen. Choose a scheduled message from the list, press 'Edit', make the changes, and then 'Save'.
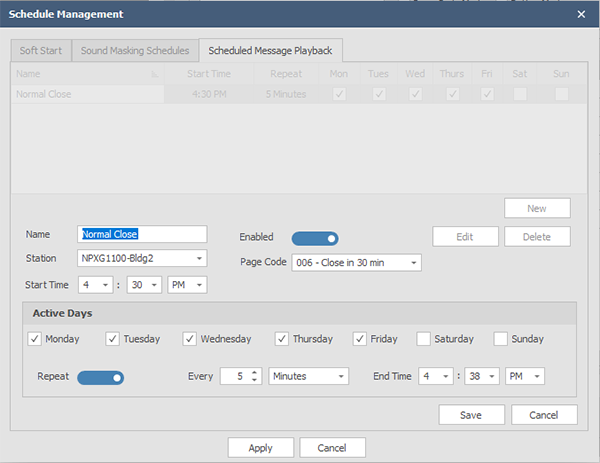
Once all of the message playback schedules have been created and enabled they should be sent to the system. Press 'Apply' to send them to the system and you will see a pop up noting that the schedules have been successfully sent.
