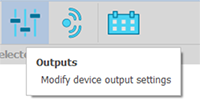
Both the device Outputs (for audio settings) and Fault Monitoring are accessed from the Output Settings icon. Choose a Qt X device in the Devices and Systems list and click the device output settings icon to make changes to audio outputs or monitor faults on passive emitter runs. This setting is not available for NPX devices. Fault Monitoring is only available for passive emitter runs. Click on the link below to jump to that section.
Device Audio Output Settings Fault Monitoring
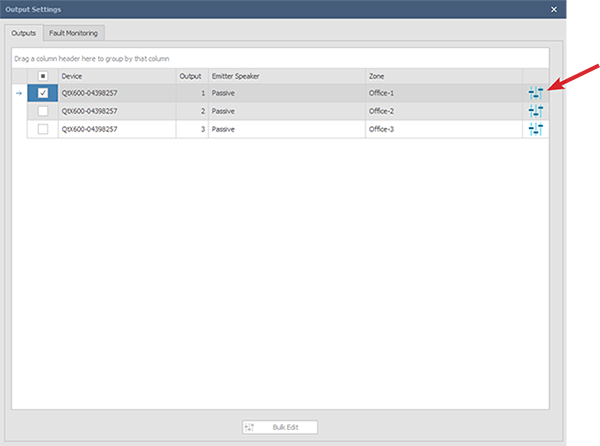
Make changes to the device audio output settings by selecting the output and pressing the fader icon (red arrow).
Filter options are also available for speaker outputs (second image below). Setting options may vary depending upon the type of speaker or emitter.
Passive emitters
8 ohm speakers
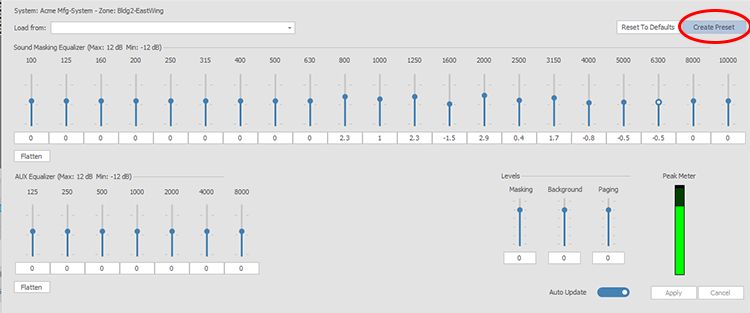
Users may make adjustments via the sliders or by entering a value directly in the field below the slider (adjusting one will automatically show the same value in the other). Flatten will adjust all sliders back to 0 dB. Reset to Default will reset all output settings. If Auto Update is enabled each adjustment will be sent automatically, otherwise press 'Apply' to send the settings to the device.
System and Device fields at top are non-editable and based on the device selected. Users may select any available output (zone) to adjust.
The peak meter gives a visual representation of output level and if the audio is clipping.
Selecting Auto Output will make audio adjustments in real time. A green checkmark will appear briefly to indicate that the change has been transmitted.

As adjustments are made, a checkbox will appear that indicates the changes take affect. See the video clip below:
If Auto Update is disabled (toggled off), users must click 'Apply' to make changes.
Create Presets by making changes to the settings and then click the 'Create Preset' button. An explorer window will open and allow you to save the preset file (*.qtxpre). The generated file name will contain the details of where the preset is coming from. Press 'Save' to save the file.
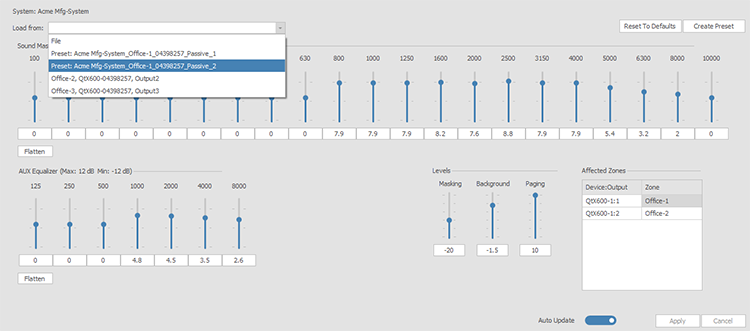
Load presets by opening the dropdown list. Choose the appropriate preset. You must use the same type of device (emitter or speaker), and should have the same area characteristics (room size, ceiling height, environment). If Auto Update is enabled, the change will be sent to the device immediately. Otherwise, Click 'Apply' to send the information.
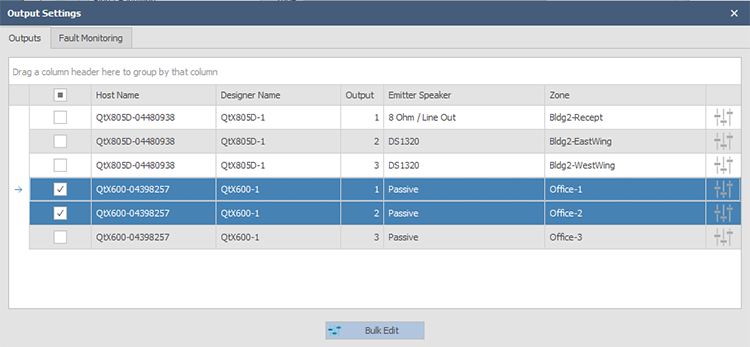
Bulk Updates can also be made to the audio settings and levels in groups of like outputs. You must first refresh the devices and have a system selected for the output settings icon to be available.
Click on the checkboxes of the desired devices. They must share the same emitter speaker type, and should be in the same type of environment. Click the 'Bulk Update' button to bring up the levels setting window. Settings can be modified and saved as a preset file by pressing the 'Create Preset' button the same way as explained in the Presets section above. All of the affected outputs and zones will be displayed in a small box on the bottom right.
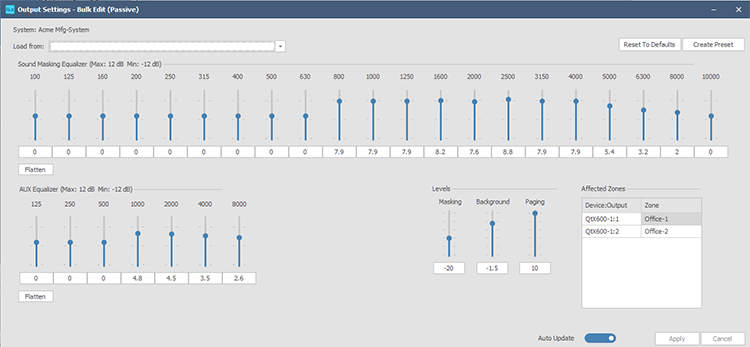
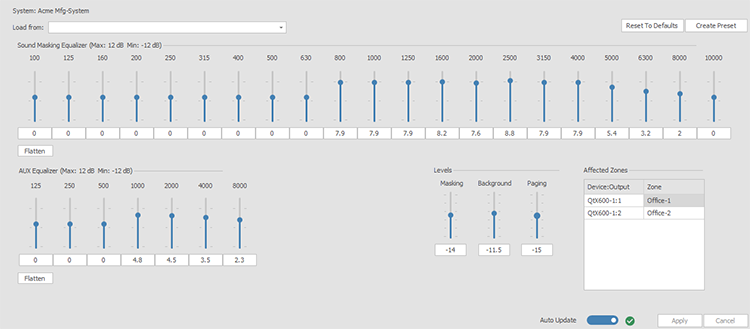
Make any changes to the settings manually or by loading from a preset (see drop down list and the resultant warning below). If the Auto Update is enabled the changes will be made and a green check will appear for a few seconds. If the Auto Update is not enabled press 'Apply' to send the settings.
Fault Monitoring can be enabled to check runs of passive emitters for shorts, open circuits or to detect changes in the impedance of the emitter circuits. This allows the installer to check the channel impedance status of one or more runs of passive emitters. This feature only works on runs with Passive Emitters. Keeping the monitoring function on is useful to detect if there are any changes resulting from tenant construction or purposful disconnection of an emitter. The system will report a fault letting the system administrator or commissioner know something has physically changed since they were last on site.
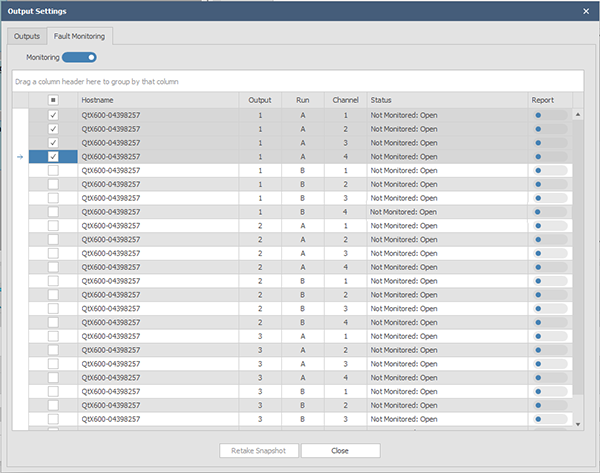
To start Fault Monitoring, select the system from the Devices and Systems view and then click on Outputs. Open the Fault Monitoring tab and select all or specific Runs to measure by checking the boxes in the left column. Toggle the Monitoring switch on and a warning will pop up with information about masking level changes during measurement. Press 'Yes ' to continue.

When the process is finished the result will be shown on screen. If no faults (shorts or opens) are discovered, the screen will show an OK status for the runs tested. This is a live test and the system will continue to monitor the impedance status of those runs until the monitoring switch is toggled off. This feature is only available in Qt X software, so once the system is checked and running correctly, it can be toggled off if desired. Leaving Fault Monitoring enabled doesn't affect the system functionality. Keeping it enabled will provide a fault indicator if there are any changes on the designated emitter runs.
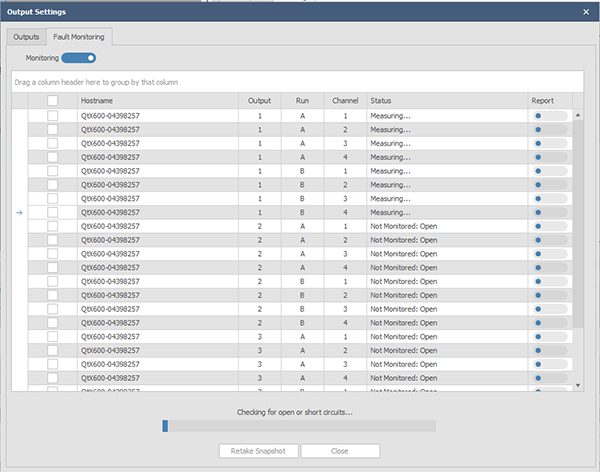
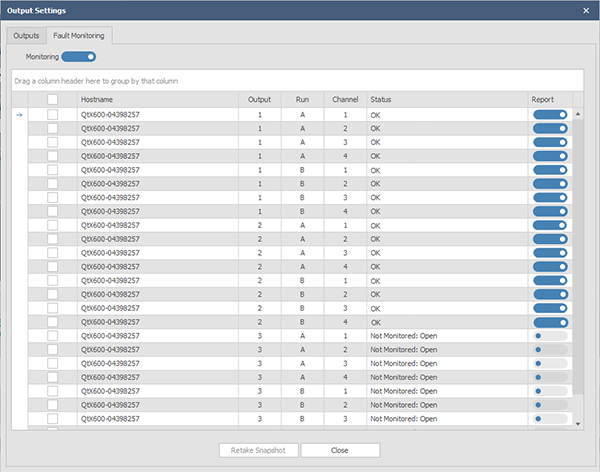
A new snapshot should be taken after any changes to the emitters or the wiring on the runs. Press 'Retake snapshot' to do so.
NOTE: This feature measures the impedance on each channel, so if there is a 'Short' or an 'Open' it will show up on that channel and then all following channels on that Run.
Output X – Run A = Channels 2,3,4,1,2,3,4,1,2,3 etc.
Output X – Run B = Channels 4,1,2,3,4,1,2,3,4,1 etc.
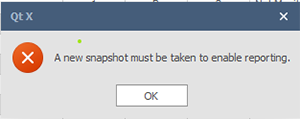
If different runs are selected or changes to the system configuration are made it is necessary to retake a snapshot to report the status correctly. A popup warning will also appear indicating a new snapshot should be taken.
